Search This Blog

Tuesday, January 26, 2010

Chore Chart

I've had this piece of sheet metal sitting on top of my fridge for MONTHS. I finally figured out what to do with it and made a chore chart to help my kids visualize what they need to get done. (Actually it's more for me so I don't just do crafts ALL day!)

I used 2 colors of scrapbook paper and Mod Podge for the background. You can actually drill through the sheet metal with a regular old drill, just use a little bit of oil in the spot you're drilling. (ANY oil, even Pam!) I Mod Podged clipart pictures to the back of glass bubbles then hot glued a magnet onto each one. I then Mod Podged ribbon to separate everybody's rows. I used stickers from American Crafts for the words and I used clothes pins and printed pictures for the name tags. It really wasn't that hard, I just took forever to finish!!

(YAH, I know I have to remind myself to give the 2 youngers a bath, thus it goes on the chore chart.....that's how you know you have too many kids!)

Tuesday, January 19, 2010

Family Home Evening Chart #2

Out with the old in with the new! I have been so busy making FHE Charts for other people I finally got around to making ours!! Here is the old:


And the new!


So cute!!!


Wednesday, January 13, 2010

Blankets

For a beginner at the sewing machine, I felt like these turned out not so bad! Each of my kids got a blanket for Christmas this year. I cut 6 inch squares because I am lazy and the clear thing that goes over my rotary board is 6 inches wide.....6 inches on a TWIN size quilt is small. Next time I'll be less lazy!


Girl #1


Girl #2


Boy #1


Boy #2 (The baby, that's why it's smaller.)


Doggie Cake


My daughter chose this cake from Family Fun for her birthday last year. We used 2 rounds for the body and 2 cupcakes for the feet. The eyes and collar gem are smushed Tootsie Rolls (Couldn't find Necco's) and the collar and tongue are Fruit By The Foot. His toe nails are Junior Mints and spots are mint cookies/Junior Mints. Didn't take too long and turned out fabulous!


Hamburger Cake


So I was able to convine my son this year that we could do some other party cake besides trains, so after showing him some COOL cakes on Family Fun, he opted for the Hamburger! We used a metal bowl for the top, a round cake pan for the bottom, a round cake pan for the middle meat, smushed green Tootsie Rolls for the lettuce, and sunflower seeds for the bun. His cousins thought it was the best cake ever! It didn't taste too bad either because we did each layer a different flavor! (I also LOVE Smith's for always giving me a cake box FOR FREE!)


Train Cake


I made this cake last summer for our then turning 4 year old train addict. I picked up a lot of different ideas online and threw them all together into something that worked for me!! The Engine is shaped with cake, an ice cream cone, and marshmallows for smoke. The train cars were baked in a miniature loaf pan I bought at Michael's (Cooks 12 at one time. Perfect for Christmas bread or mini meat loafs!) We used Oreo's and M&M's for the wheels. The toppings on the train cars were Oreo's (coal), M&M's, Tootsie Rolls (logs), Pretzels (logs), and animal crackers. We used graham crackers and frosting for the tracks. Such a cute cake and worth every 5 hours it took to make!


Beach Cake


Birthday's are especially fun at my house because I spend HOURS making each of my kids a funner than normal birthday cake! This one was for a summer beach party we had last year. We used blue frosting for the water, and smushed graham crackers for the beach. We picked up some little sea critters at Zurchers, included a rubber ball for the beach ball, and cut up a fruit strip for the towel. Wala! Cutest cake all summer!


Quiet Book (so far!)

I decided having 2 babies a year apart is going to be REAL fun for sitting through 3 hours of church, so I am on a major rush to get some projects done that will keep them entertained as they get older. I looked online at SO many places for ideas, I'm sure I won't give credit to everyone involved but I will do my best! (See bottom of post for websites.)

The Pellon: I purchased Pellon, or Interfacing, at my local JoAnn store. It was EXPENSIVE ($5.99a yard for the thick stuff!) I was able to get 16 pages out of 3 yards. It was 20 inches wide, so I cut the pages so they are each 12 inches across and 10 inches up. (Left a little bit extra room for the button holes on the sides.)

The Binding: I looked at a lot of different ways to bind it together. (Like glue, or not cutting the pages but sewing them together right down the middle then folding the whole book together.) The one I liked the best was sewing 3 button holes in the side of each page and using rings. I prefer this way because I can take pages out and add to it as I go. Eventually I will make a fabric case for everything so the little parts can't get lost.

The Designs: Some of the templates I used from Homemade By Jill, but most of them I either hand cut, or printed clipart off the computer and traced it onto my felt.

The Felt: The felt on rolls at Joann's is usually $6 a yard, but it was on sale 50% off. Felt is a lot wider than other fabrics, so I only needed 1/3 yard of each color. I got 15 colors off the roll and bought some of the 8x11 felt sheets that were not offered on rolls (Like sparkly red, sparkly white, sparkly black, tan, and hot pink!!) Buying the felt off the roll is SO MUCH CHEAPER (if you get it on sale) than buying the felt sheets so don't be deceived!!

Here's what I have so far. Definitely not finished but it's a word in progress.


Rocket Ship that blasts on the string all the way to the moon!


Boy playing Peek-A-Boo!! I would love to add words to this page, but my handstitching looks terrible so I am still trying to figure out what to do. (I know, the hands on are backwards...I'll fix it later!)


Fish tank and fish food. Fish food is velcro'ed on. When you feed the fish, you pull them up the string to make them swim to the top to eat!


Tree with snap on apples and a bucket to put them in after they've been picked.


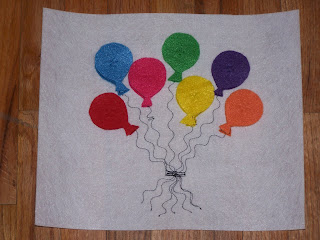
Balloons to match and snap on. (I went for snap vs velcro because they are quieter for church!) Decorative stitch on the strings!!


Winter Mittens so baby can put his hands inside!


Farm House with barn doors and finger puppets inside!! Also not shown, an owl hiding in the upper flap.


Plate and items to build a sandwich. Still debating if I should velcro these. They stick together pretty well already!


Fall Tree with a little flap and a birdie! Decorative stitching of my Singer came in SO handy!! It made the leaves look like they had veins without any extra work from me!

Where I got my ideas:
http://homemadebyjill.blogspot.com/2009/10/audreys-quiet-book.html
http://homemadebyjill.blogspot.com/2009/06/finished-quiet-book.html
http://www.scribd.com/doc/15920304/Quiet-Book-Instructions
http://www.drycreekdesign.com/quiet-books.html
http://www.simplicity.com/p-1986-crafts.aspx
http://naptimejournal.blogspot.com/2009/04/quiet-book-ideas.html
http://sewcando.blogspot.com/2009/09/quiet-time-part-2-quiet-books-abound.html
http://www.quietbook.blogspot.com/
http://swishina.blogspot.com/2009/10/quiet-book.html
http://sewing.about.com/od/toysanddolls/ss/childshapebook.htm

Sorry if I left anyone out!!

Fabric Toy Bucket


So I have seen a couple of these online and thought I would try one out. I don't like any of the tutorials that I saw (either too small or circle buckets) so I kind of was sewing by the seam of my pants (haha). This bucket is quite LARGE!! 20x20x20. I was at first a little disappointed I made it SO big, however now I love it because it fits ALL of the baby toys (Bumbo, Ball Popper, Boppy included!) I made the mistake of not prewashing the denim and ended up blue all over. Oops, that's a beginner sewer for you!

I honestly can't even type any directions for you because I just kind of figured it out as I went! Sorry, but at least you can get a good look at it!

Snowman with Mod Podge


This, as well with the trees from a previous post, had been sitting in my garage for TWO years before I finally got to them!! I Mod Podged paper to the snowman to make him SO much cuter than just painting alone. He's one of those snowmen who have holes around the sides to poke lights through. Here's what I did:

1. Measure paper and cut to fit appropriate parts of snowman. (tricky on something this large!)

2. Paint the back of the snowman white. I usually paint around the front edges just a tad in case my paper doesn't cover a spot.

3. Mod Podge paper onto snowman one section at a time.

4. After everything has dried, spray with Acrylic Spray and let dry over night.

5. Poke holes through the apper from front of snowman to back. I used a screwdriver.

6. Push the lights through the back and plug it in!! Perfect for Christmas through winter!!